

Setting up a shower infuser at home is easiest when you use a tool-free, in-line attachment that connects directly to your existing shower hose. This method requires no plumbing, no electricity, and no special tools. You simply unscrew the hose, attach the unit, and tighten it by hand. This approach ensures a secure, leak-free setup that you can complete in minutes.
Understanding the In-Line Connection Method
The most accessible installation method for a shower infuser is the in-line connection. This technique involves placing the device between the shower head and the shower hose. It is the standard approach for most modern infuser systems because it utilizes the existing water pressure to function. You do not need to modify your plumbing or install new pipes. The device acts as a simple intermediary that blends your chosen product into the water stream as it flows to the head.
This method is ideal for renters or individuals who want a non-permanent solution. Because it relies on standard hose threads, it is compatible with most standard shower setups. The key to success is ensuring the threads match. Most standard hoses use a universal thread size, which makes the connection straightforward. If your shower uses a non-standard fitting, you may need a simple adapter, but for the majority of homes, the direct connection works perfectly.
Step-by-Step Installation Process
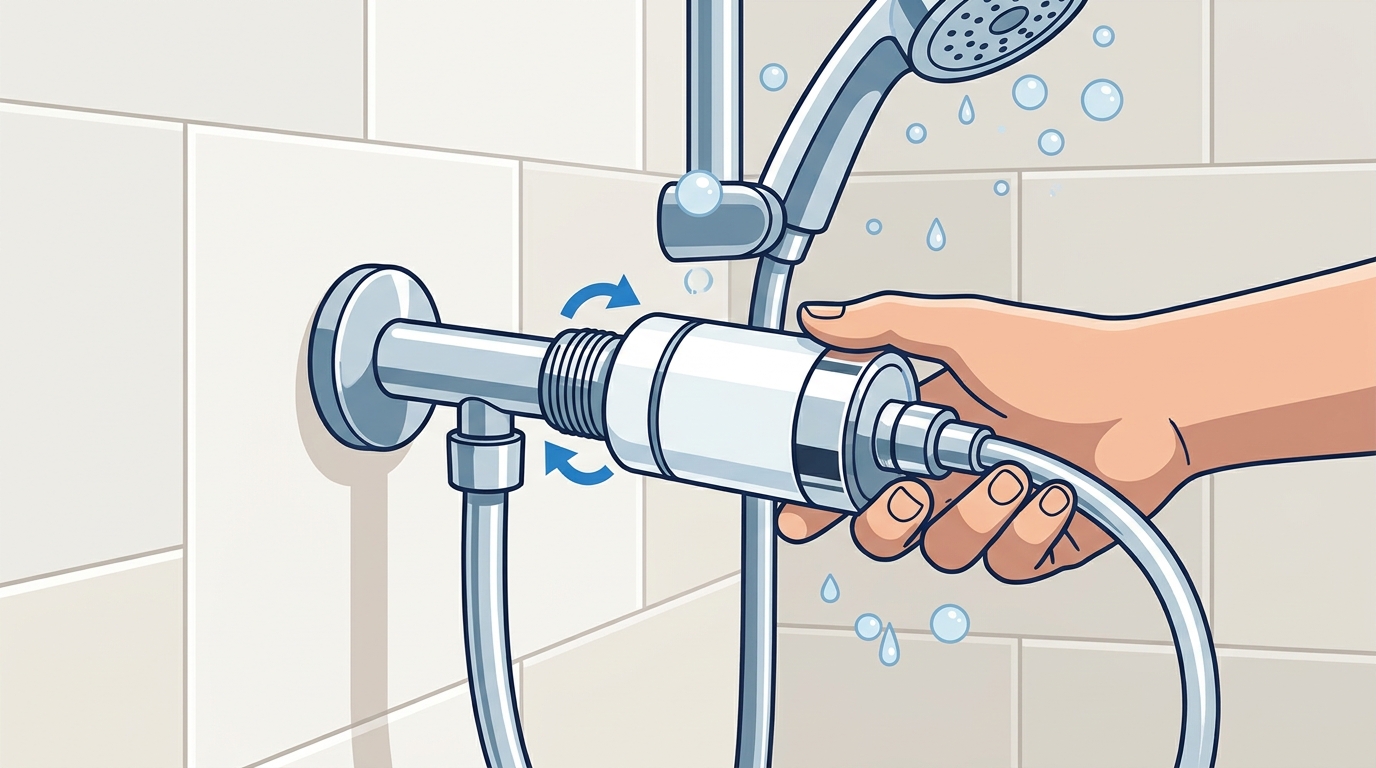
Installing the unit is a three-step process that takes less than five minutes. First, turn off the water supply to your shower. This prevents water from spraying out when you disconnect the hose. Next, unscrew the shower hose from the shower head. You will see the male threads on the hose and the female threads on the shower head. Take your time to ensure the rubber washers are in place before proceeding.
Second, attach the shower infuser unit to the end of the hose. Hand-tighten the connection until it is secure. Do not use pliers or wrenches, as this can damage the internal seals or the unit itself. Finally, attach the shower head to the other end of the infuser unit. Again, hand-tighten the connection. Once both ends are attached, turn the water back on. Check for any leaks at the connection points. If you see a drip, tighten the connection slightly by hand. If it is dry, you are ready to use the system.
Mounting the Unit for Easy Access
Once the in-line connection is secure, you need to mount the unit on the wall. This keeps the device stable and within reach. Most infuser systems come with mounting options that do not require drilling. You can use adhesive patches or a suction cup mount. These options are ideal for tile or glass surfaces. Ensure the surface is clean and dry before applying the adhesive. Press the unit firmly against the wall and hold it for the time specified in the instructions.
If you prefer a more permanent solution, you can use the drilling template provided. This allows you to screw the unit into the wall. This is a good option if you have a heavy unit or if you want to ensure it never falls. Mount the unit at a height that is comfortable for you to reach. It should be at the same level or slightly higher than the shower head. This positioning helps with water flow and prevents air locks in the chamber.
Choosing the Right Product for Your Infuser
Not all shower products are created equal when it comes to infuser compatibility. You need to choose a liquid product that flows easily. Thick, creamy shampoos or body washes can clog the internal mechanism of the infuser. Look for products that are labeled as "low viscosity" or "liquid." These products will mix evenly with the water and rinse away cleanly. Avoid products with heavy oils or thick particles, as they can build up inside the chamber over time.
When you first use your new infuser, start with a small amount of product. This allows you to test the flow and ensure there are no clogs. You can adjust the amount of product by using the control dial on the unit. This dial allows you to switch between plain water and infused water. It also lets you adjust the dilution level. This feature is crucial for maintaining the integrity of the device and ensuring a consistent shower experience.
Maintenance and Cleaning Tips
Regular maintenance is key to keeping your shower infuser working smoothly. After each use, rinse the chamber with clean water. This prevents product residue from drying and clogging the system. If you switch between different products, make sure to clean the chamber thoroughly. This prevents mixing of different scents or ingredients. A simple rinse with warm water is usually sufficient. You can also use a soft cloth to wipe the outside of the unit.
Check the connections regularly for any signs of wear or leakage. If you notice a leak, replace the rubber washers. These are inexpensive and easy to find. By following these simple maintenance steps, you can extend the life of your infuser and ensure it continues to provide a safe and effective showering experience. Proper care is the easiest way to keep your setup running without issues.
Key Takeaways
- Use a tool-free, in-line connection to attach the infuser between the hose and shower head.
- Hand-tighten all connections to avoid damaging the internal seals or the unit.
- Mount the unit on the wall using adhesive patches or a drilling template for stability.
- Choose low-viscosity liquid products to prevent clogging the internal mechanism.
- Rinse the chamber with clean water after each use to maintain flow and prevent residue.
- Check connections regularly for leaks and replace washers as needed.
Frequently Asked Questions
Do I need a plumber to install a shower infuser?
No, a plumber is not required. The installation is designed to be tool-free and can be completed by the user in minutes.
Can I use any shampoo or body wash in the infuser?
You should use low-viscosity liquid products. Thick or creamy products may clog the system. Check the manufacturer's guidelines for compatibility.
How do I clean the infuser chamber?
Rinse the chamber with warm water after each use. If switching products, clean the chamber thoroughly to prevent mixing.
What if I notice a leak after installation?
Check that the connections are hand-tight. If the leak persists, replace the rubber washers. Do not use tools to tighten the connections.
Is the infuser compatible with all shower heads?
It is compatible with most standard shower heads. Ensure the threads match. If you have a non-standard fitting, you may need an adapter.
Start Your Independent Shower Routine
Setting up your shower infuser is a simple task that can significantly improve your daily routine. By following these steps, you can enjoy a safer, more convenient, and more dignified showering experience. Explore the easy install guide for more detailed instructions and tips. Mistu Shower Infuser is designed to make this process as seamless as possible, allowing you to focus on what matters most: your comfort and independence.